
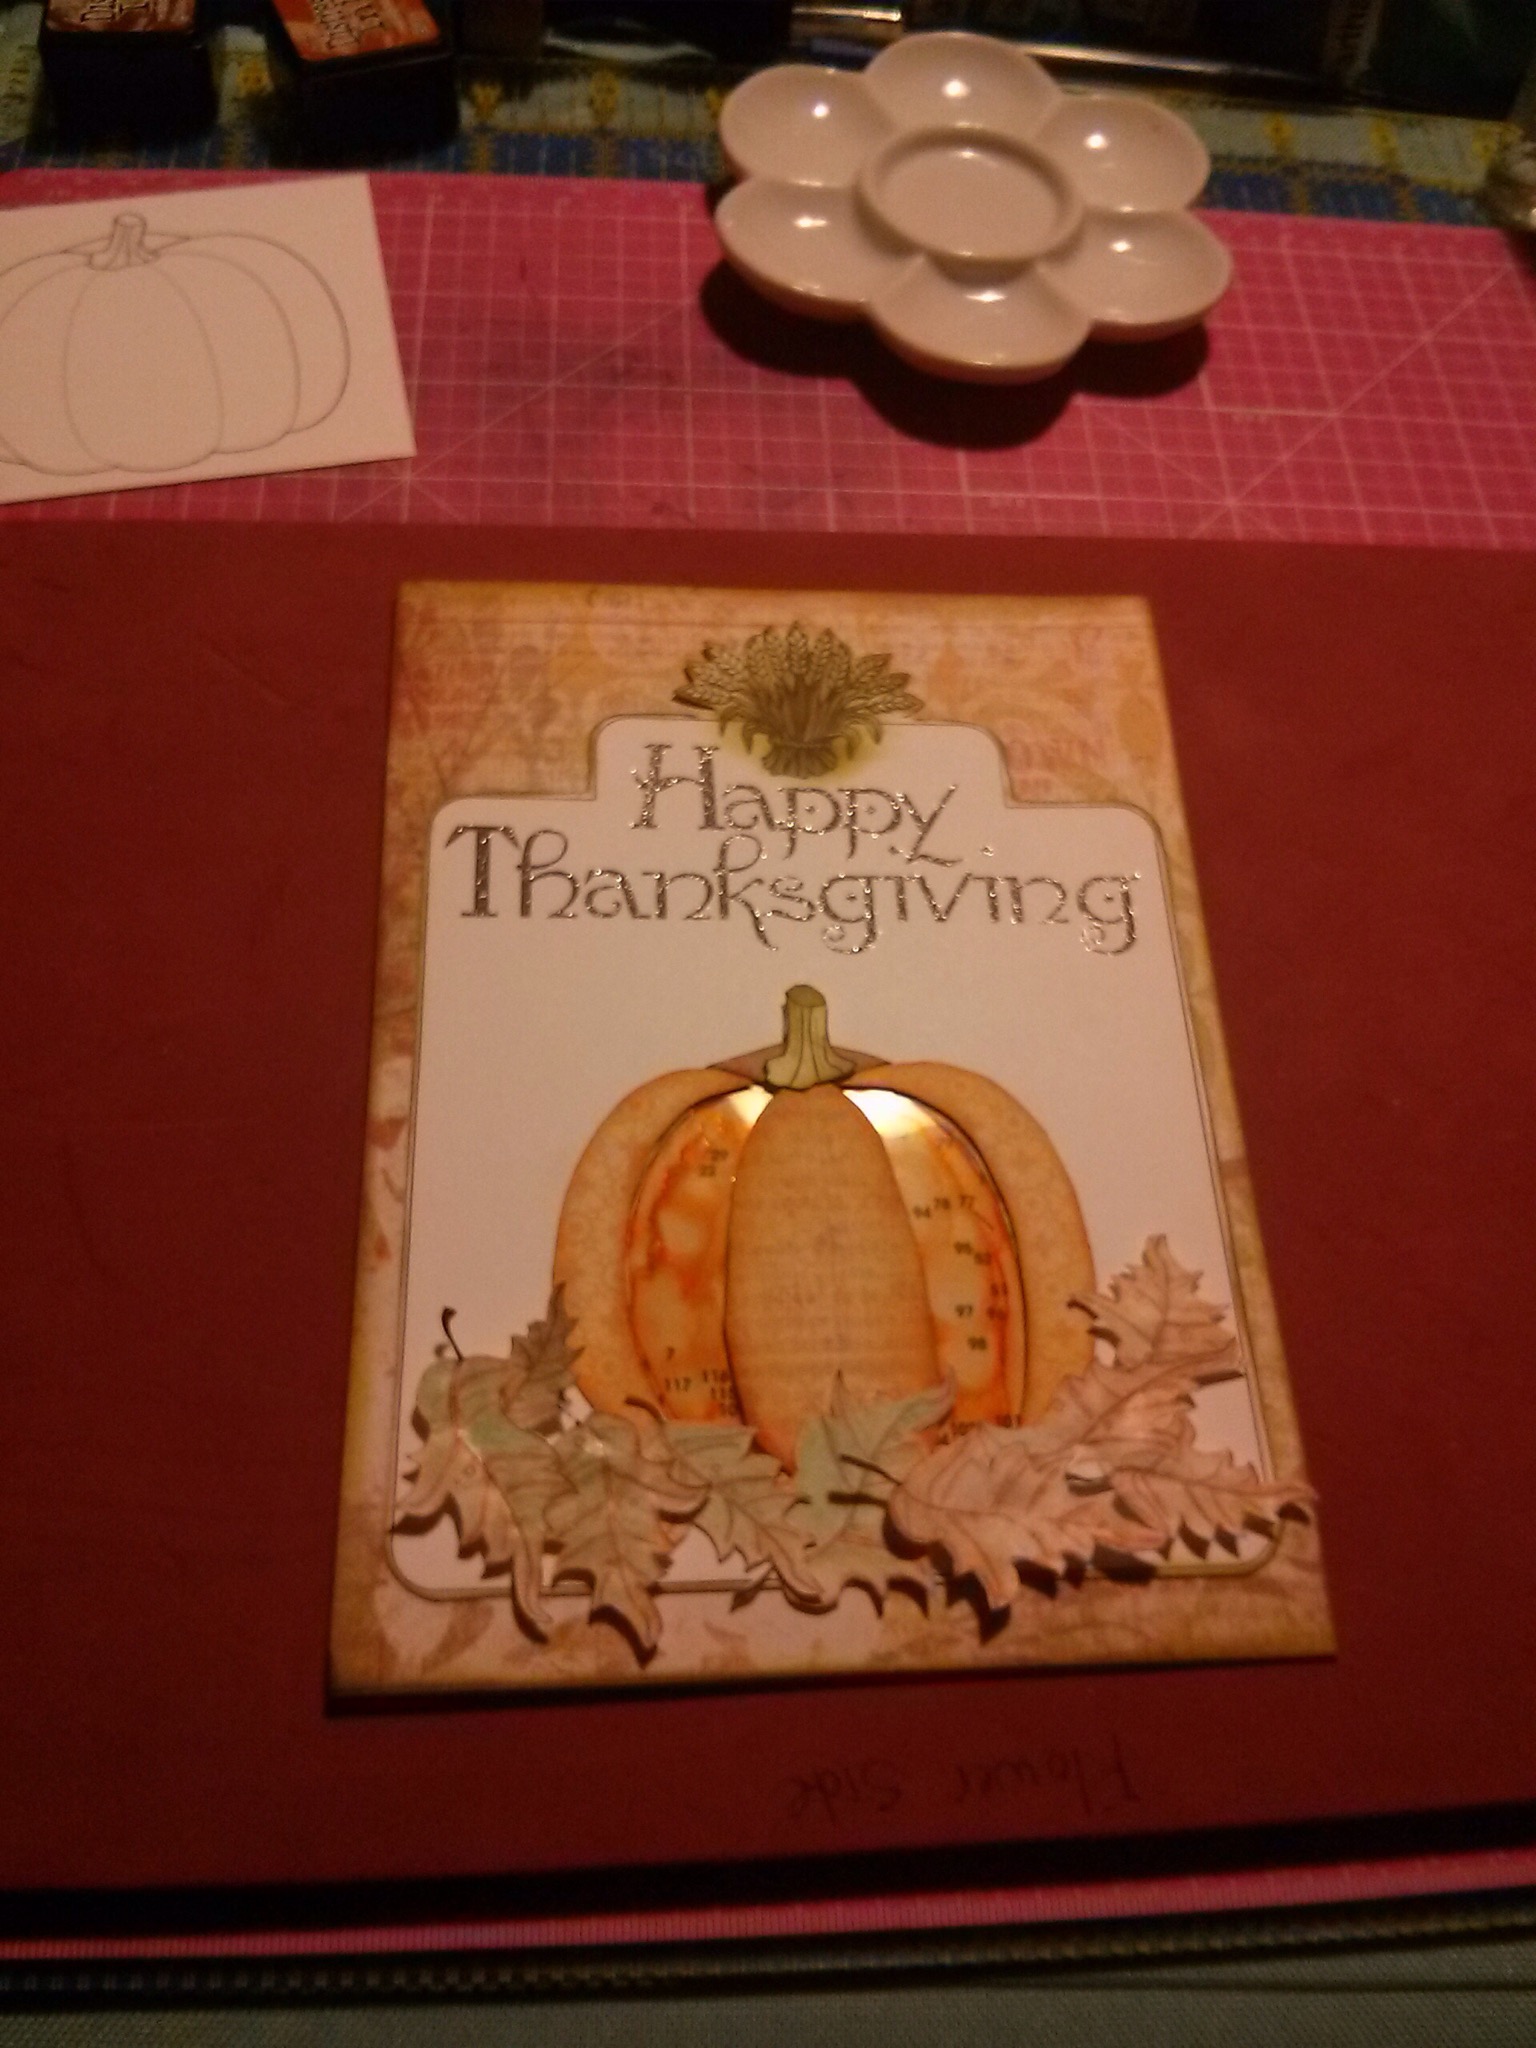
Here is the Last Minute Thanksgiving card I made for this year. You will find the art work and instructions to make your own below. This has been the easiest card I have made so far. It also might be my favorite to date. It is a great activity for kids to do while waiting for their turkey dinner.
You will need the IMAGE PDF and the SAMPLE PUZZLE as well as the items below:
- Card stock for 5″ x 7″ card base; I used 110lb. Card stock to print the IMAGE PDF on; I used 80lb. The cut outs hold up better if they are printed on card stock.
- Pattern paper for card front, card inside, pumpkin right and left sides, pumpkin center front and back (see below). Use scraps for the pumpkin, they are small. I think it looks better if the pumpkin paper is different for the sections. Every card maker likes things a little different. 🙂
- Piece of acetate larger than the pumpkin. You can even use it from cardboard boxes that have the clear plastic windows. Recycle/Reuse.
- Scissors. You may want a blade to cut an X in the center of the pumpkin cut out.
- Tape and glue or a Xyron X sticker maker and foam or pop dots.
- Ranger Distress Vintage Photo ink or something similar to edge the images.
- Pencils, gel pens or markers to color the leaves. If you use water color pencils, don’t forget the water! I used a water brush and just wiped it off in between colors.
- Alcohol marker to color the back of the pumpkin acetate.
- Zig Wink of Stella clear marker. If you don’t have one, you really should look into them.
- A way to curl the leaves, even if you bend them around a pencil.
Pingback: 15 Fun Activities to do this Fall | Inside Aimee's Victorian Armoire